Physical Address
304 North Cardinal St.
Dorchester Center, MA 02124
Today, I will give you an example of “How to Create a Dynamic Countdown Timer in Laravel”, So you can easily apply it with your laravel 5, laravel 6, laravel 7, and Laravel 8 application.
First, what we’re doing here, This is the example :
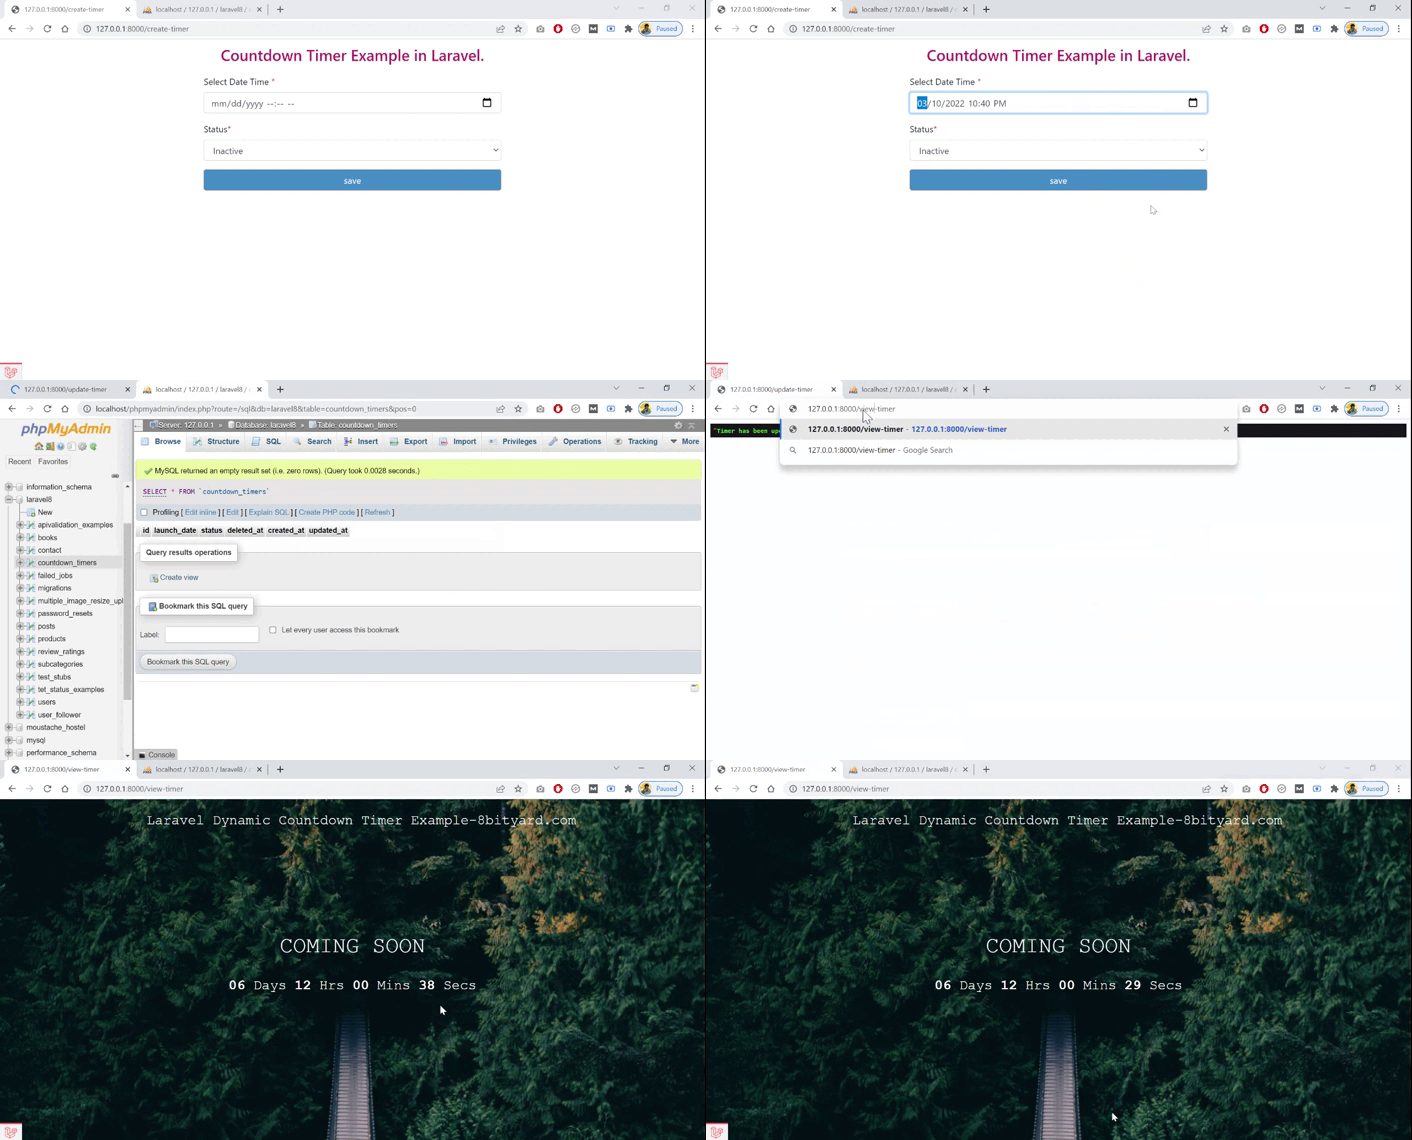
The countdown timer is used for e-commerce applications for sales or upcoming sales and website launch and Maintainance or coming soon page in web application.
We can also make a countdown timer with JavaScript, but the timer will reset if you refresh the tab. You can make the counter-timer run indefinitely by using Laravel. If you refresh the page, the timer continues to run.
We will add Timer JavaScript CDN. To achieve a dynamic time countdown, we’ll use both Laravel and a database.
The Laravel update activity assists with refreshing the MySQL data set. Users can refresh the time as needed.
Let’s get started.
Generating Migration with Model
php artisan make:model CountdownTimer -mMigration Structures
<?php

use Illuminate\Database\Migrations\Migration;
use Illuminate\Database\Schema\Blueprint;
use Illuminate\Support\Facades\Schema;

class CreateCountdownTimersTable extends Migration
{
    /**
     * Run the migrations.
     *
     * @return void
     */
    public function up()
    {
        Schema::create('countdown_timers', function (Blueprint $table) {
            $table->id();
            $table->dateTime('launch_date');
            $table->boolean('status');
            $table->softDeletes();
            $table->timestamps();
        });
    }

    /**
     * Reverse the migrations.
     *
     * @return void
     */
    public function down()
    {
        Schema::dropIfExists('countdown_timers');
    }
}
Run Migration
php artisan migrate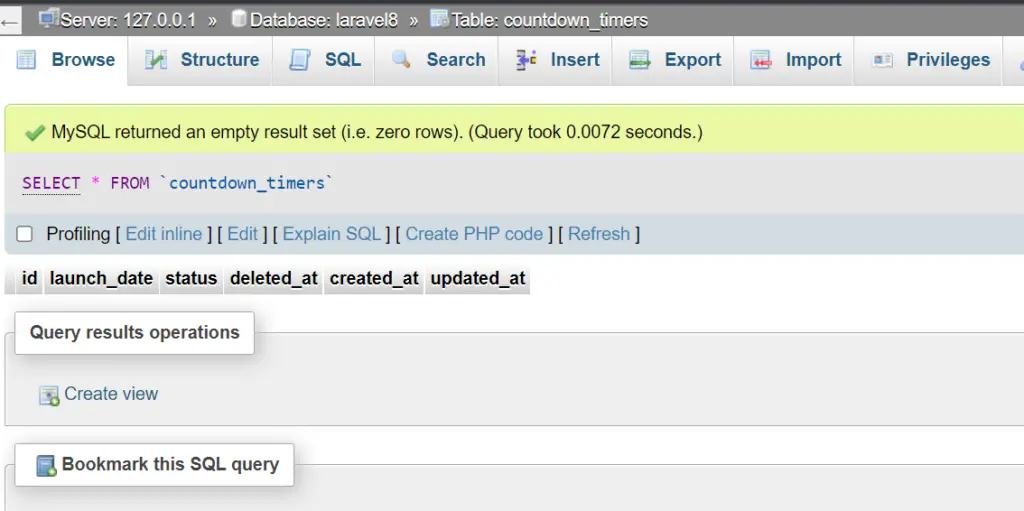
app\Models\CountdownTimer .php
<?php

namespace App\Models;

use Illuminate\Database\Eloquent\Factories\HasFactory;
use Illuminate\Database\Eloquent\Model;
use Illuminate\Database\Eloquent\SoftDeletes;

class CountdownTimer extends Model
{
    use SoftDeletes;
    use HasFactory;
}
Create a Controller
php artisan make:controller CountdownTimerControllerDefine Web Routes
routes\web.php
<?php

use Illuminate\Support\Facades\Route;
use App\Http\Controllers\CountdownTimerController;

/*
|--------------------------------------------------------------------------
| Web Routes
|--------------------------------------------------------------------------
|
| Here is where you can register web routes for your application. These
| routes are loaded by the RouteServiceProvider within a group which
| contains the "web" middleware group. Now create something great!
|
*/


#Countdown timer example
Route::get('/create-timer', [CountdownTimerController::class, 'create']);
Route::post('/update-timer', [CountdownTimerController::class, 'update'])->name('timer.update');
Route::get('/view-timer', [CountdownTimerController::class, 'view']);
app\Http\Controllers\CountdownTimerController.php
<?php

namespace App\Http\Controllers;

use Session;
use Illuminate\Http\Request;
use App\Models\CountdownTimer;

class CountdownTimerController extends Controller
{

    public function create(){
        return view('timer.create');
    }

    public function update(Request $request)
    {
        $timer_id ='1';
        $timer = CountdownTimer::findOrNew($timer_id);
        $timer->launch_date = $request->date_time;
        $timer->status = $request->timer_status;
        $timer->save();
        dd('Timer has been updated successfully!');
    }

    public function view(){
        $timer = CountdownTimer::first();
        return view('timer.view',compact('timer'));
    }
}
Create Blade Files
We create a timer folder in views and then create these 2 files given below-:
Download Countdown Timer Js file with complete code:-
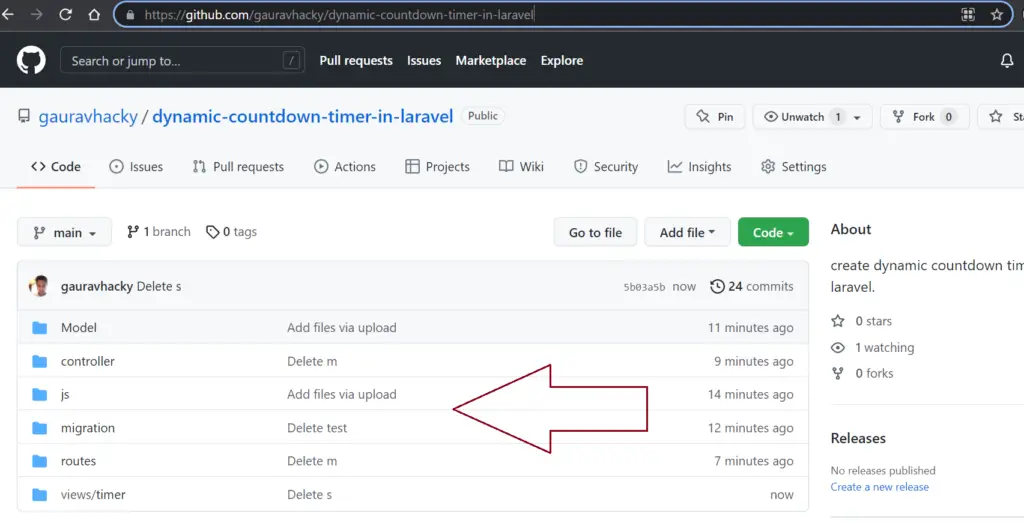
<a href="https://github.com/gauravhacky/dynamic-countdown-timer-in-laravel" target="_blank" rel="noreferrer noopener">https://github.com/gauravhacky/dynamic-countdown-timer-in-laravel</a>resources\views\timer\create.blade.php
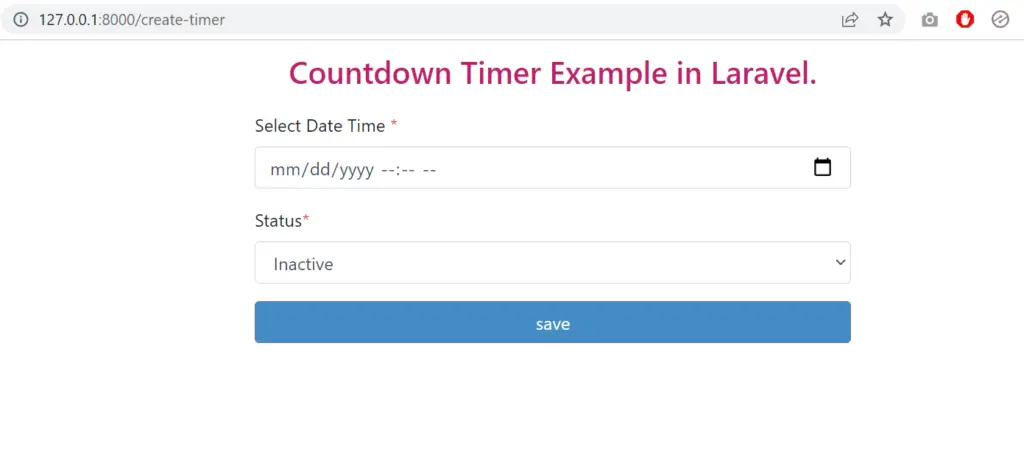
<!DOCTYPE html>
<html>
   <head>
      <link rel="stylesheet" href="https://maxcdn.bootstrapcdn.com/bootstrap/4.5.2/css/bootstrap.min.css">
      <script src="https://ajax.googleapis.com/ajax/libs/jquery/3.5.1/jquery.min.js"></script>
      <script src="https://maxcdn.bootstrapcdn.com/bootstrap/4.5.2/js/bootstrap.min.js"></script>
      <style>
         a {
         color: #BE206B!important;
         }
         a.btn.btn-lg.btn-block,.btn-info {
         color: white !important;
         }
         .btn-secondary {
         background-color: #448BC6!important;
         color: #fff!important;
         }
         button.btn.btn.btn-secondary {
         width: 100%;
         }
         h3 {
         text-align: center;
         line-height: 200%;
         }
         .collpa
         .pt-0, .py-0 {
         padding-top: 0!important;
         }
      </style>
   </head>
   <main>
      <div class="container">
      <div class="row justify-content-center">
         <div class="col-lg-6">
            <div class="main">
               <h3><a>Countdown Timer Example in Laravel.</a></h3>
               <form role="form" action="{{route('timer.update')}}" method="post">
                  @csrf
                  <div class="form-group">
                     <label for="name">Select Date Time <span class="text-danger">*</span></label>
                     <input type="datetime-local" name="date_time" class="form-control"/>
                  </div>
                  <div class="form-group">
                     <label for="author">Status<span class="text-danger">*</span></label>
                     <select class="form-control" name="timer_status">
                        <option value="0">Inactive</option>
                        <option value="1">Active</option>
                     </select>
                  </div>
                  <div class="form-group">
                     <button type="submit" class="btn btn btn-secondary">save</button>
               </form>
               </div>
            </div>
         </div>
      </div>
   </main>
   </body>
</html>
resources\views\timer\view.blade.php
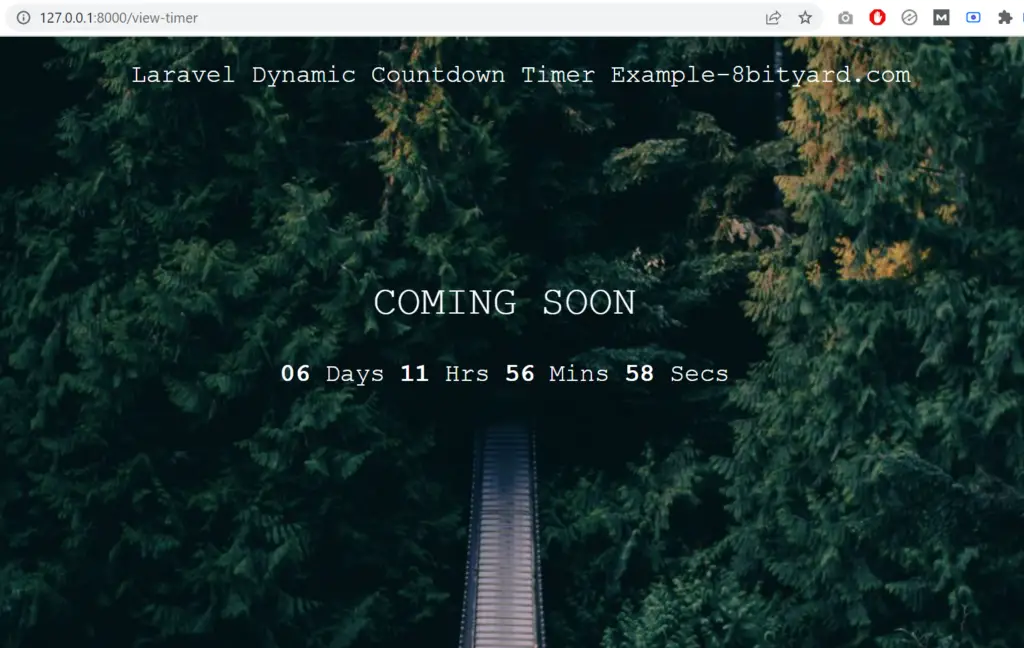
<!DOCTYPE html>
<html>
   <head>
      <link rel="stylesheet" href="https://maxcdn.bootstrapcdn.com/bootstrap/4.5.2/css/bootstrap.min.css">
      <script src="https://ajax.googleapis.com/ajax/libs/jquery/3.5.1/jquery.min.js"></script>
      <script src="https://maxcdn.bootstrapcdn.com/bootstrap/4.5.2/js/bootstrap.min.js"></script>
      <style>
         body, html {
         height: 100%;
         margin: 0;
         }
         .bgimg {
         background-image: url('https://www.w3schools.com/w3images/forestbridge.jpg');
         height: 100%;
         background-position: center;
         background-size: cover;
         position: relative;
         color: white;
         font-family: "Courier New", Courier, monospace;
         font-size: 25px;
         }
         .topleft {
         position: absolute;
         top: 0;
         left: 16px;
         }
         .middle {
         position: absolute;
         top: 50%;
         left: 50%;
         transform: translate(-50%, -50%);
         text-align: center;
         }
         p {
         margin-top: 20px;
         margin-left: 250px;
         margin-bottom: 1rem;
         }
         hr {
         margin: auto;
         width: 40%;
         }
      </style>
   </head>
   <body>
      <div class="bgimg">
         <div class="topleft">
            <p>Laravel Dynamic Countdown Timer Example-8bityard.com</p>
         </div>
         <div class="middle">
            <h1>COMING SOON</h1>
            <hr>
            <p>
            <div class="wrap-countdown mercado-countdown" data-expire="{{ Carbon\Carbon::parse($timer->launch_date)->format('Y/m/d h:i:s') }}"></div>
            </p>
         </div>
      </div>
   </body>
</html>
<script src="{{asset('js/jquery.countdown.min.js')}}"></script>
<script>
   ;(function($) {

    var MERCADO_JS = {
      init: function(){
         this.mercado_countdown();

      },
    mercado_countdown: function() {
         if($(".mercado-countdown").length > 0){
                $(".mercado-countdown").each( function(index, el){
                  var _this = $(this),
                  _expire = _this.data('expire');
               _this.countdown(_expire, function(event) {
                        $(this).html( event.strftime('<span><b>%D</b> Days</span> <span><b>%-H</b> Hrs</span> <span><b>%M</b> Mins</span> <span><b>%S</b> Secs</span>'));
                    });
                });
         }
      },

   }

      window.onload = function () {
         MERCADO_JS.init();
      }

      })(window.Zepto || window.jQuery, window, document);
</script>
Don’t forget to add the jquery.countdown.min.js file in your view blade file, you can download this file from the GitHub repository I already mention above.
Remember one thing always choose an upcoming date or time in the create blade file.
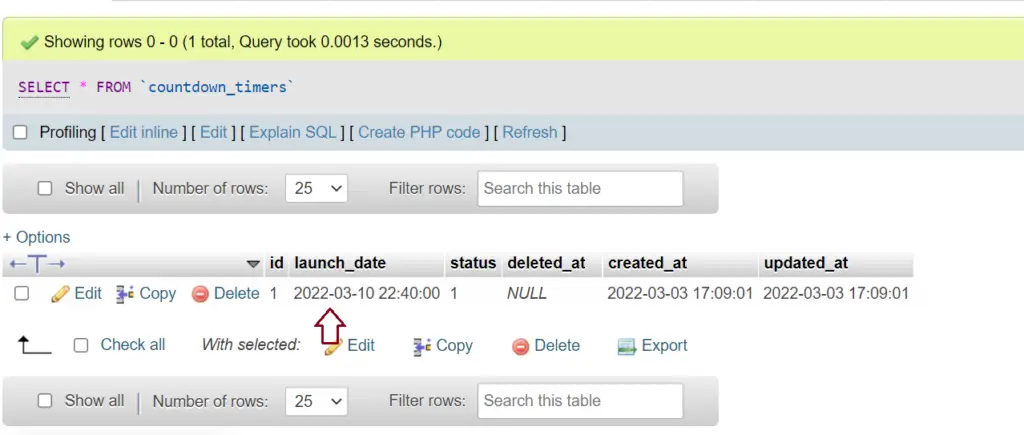
Run Application :
127.0.0.1:8000/view-timerOutput:
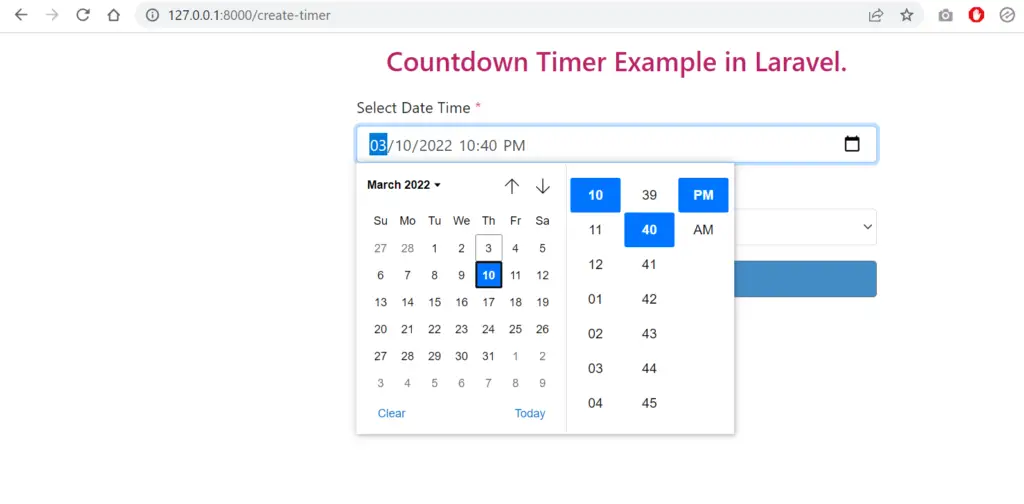


In this article, we successfully learned “How to create a dynamic countdown timer in Laravel”, I hope this article will help you with your Laravel application Project.
Read also: Product Carousel Slider in Example in Laravel.