Physical Address
304 North Cardinal St.
Dorchester Center, MA 02124

Do you want to use factory in Laravel application?
This step-by-step tutorial helps you learn how to create Factory and insert dummy records in the table in Laravel application with the help of Factory.

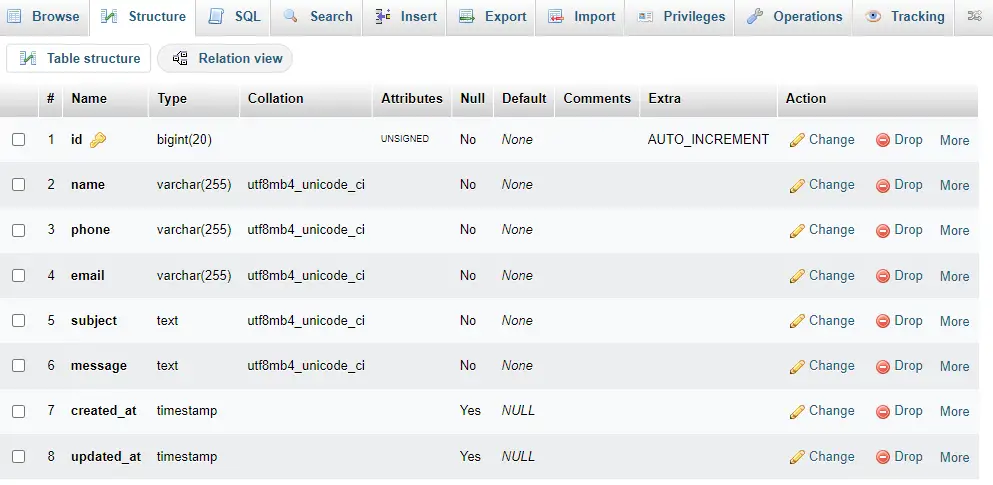
To see an example of how to write a factory we will create a contact table and create a factory to insert some dummy records in the contacts table.
When testing your application or seeding your database, you may need to insert a few records into your database. Instead of manually specifying the value of each column, Laravel allows you to define a set of default attributes for each of your Eloquent models using model factories.
In this guide, I will tell you how to use a factory in the Laravel 9 application using Eloquent Factories.
Generate a Model & Run Migration
php artisan make:model Contact -mdatabase/migrations/create_contacts_table.php
<?php

use Illuminate\Database\Migrations\Migration;
use Illuminate\Database\Schema\Blueprint;
use Illuminate\Support\Facades\Schema;

return new class extends Migration
{
    /**
     * Run the migrations.
     *
     * @return void
     */
    public function up()
    {
        Schema::create('contacts', function (Blueprint $table) {
            $table->id();
            $table->string('name');
            $table->string('phone');
            $table->string('email');
            $table->text('subject');
            $table->text('message');
            $table->timestamps();
        });
    }

    /**
     * Reverse the migrations.
     *
     * @return void
     */
    public function down()
    {
        Schema::dropIfExists('contacts');
    }
};
Next, you can migrate table properties in the database with the artisan migrate command:
php artisan migrate
app/Models/Contact.php:
<?php

namespace App\Models;

use Illuminate\Database\Eloquent\Factories\HasFactory;
use Illuminate\Database\Eloquent\Model;

class Contact extends Model
{
    use HasFactory;
}
Defining Model Factories – Generating Factories
php artisan make:factory ContactFactoryThe new factory class will be placed in your <strong>database/factories</strong> directory.
database\factories\ContactFactory.php
<?php

namespace Database\Factories;

use Illuminate\Database\Eloquent\Factories\Factory;

/**
 * @extends \Illuminate\Database\Eloquent\Factories\Factory<\App\Models\Contact>
 */
class ContactFactory extends Factory
{
    /**
     * Define the model's default state.
     *
     * @return array<string, mixed>
     */
    public function definition()
    {
        return [
            'name'    => fake()->name(),
            'phone'   => fake()->phoneNumber(),
            'email'   => fake()->unique()->safeEmail(),
            'subject' => fake()->paragraph(),
            'message' => fake()->paragraph(),
        ];
    }
}
Define Factory in Database Seeder Trait
database\seeders\DatabaseSeeder.php
<?php

namespace Database\Seeders;

// use Illuminate\Database\Console\Seeds\WithoutModelEvents;
use Illuminate\Database\Seeder;

class DatabaseSeeder extends Seeder
{
    /**
     * Seed the application's database.
     *
     * @return void
     */
    public function run()
    {

         \App\Models\Contact::factory(10)->create();

    }
}
Run your Seeder File
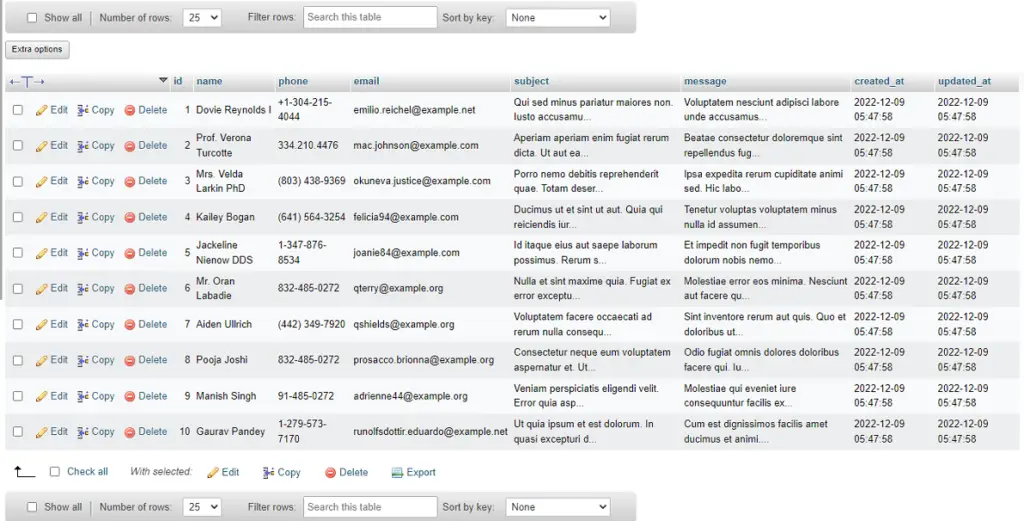
php artisan db:seedOutput:-

I hope that this article helped you learn to how to use Factory in Laravel 9. You may also want to check out our guide on How to Use Laravel Macro With Example in the Laravel application.
Read also:- Laravel Repository Design Pattern.