Physical Address
304 North Cardinal St.
Dorchester Center, MA 02124
In this tutorial, I will give you an example of a “Laravel Repository Design Pattern”, So you can easily apply it to your Laravel 5, Laravel 6, Laravel 7, Laravel 8, and Laravel 9 application.
The Repository acts as a connection layer between the Business layer and the Model of the application.
When we want to access data from the database, instead of writing processing code in the controller, we create a folder called Repository and then write the processing code here. Then we just inject it through a construct in our controller file.
Laravel provides multiple design patterns, there are some examples below:-
Repository pattern provides Laravel with clean architecture in our application, There are multiple ways to put your Business logic in multiple files like Service Class, Traits, and Model.
Related article:- How to Use Service Class In Laravel.
The basic folder structure works ok for small projects, but as soon as you write more and more controllers, models, etc. it gets very hard to find the actual file you are looking for.
Laravel project with a folder-by-feature structure is a best practice for large-scale applications, so we confuse, about where to put logic in Laravel, how to follow Laravel clean architecture, and business logic in service, and also put the business logic in the model in our Laravel application.
So, let’s follow the clear Laravel Repository Pattern with an Example of the Student Crud application:-
Install Laravel Project
composer create-project laravel/laravel example-appMake Database Connection
If you are developing a Laravel application and want to connect to the database, so open the .env file then insert your database name, username likewise the password:
DB_CONNECTION=mysql
DB_HOST=127.0.0.1
DB_PORT=3306
DB_DATABASE=database
DB_USERNAME=root
DB_PASSWORD=
Generate a Model & Run Migration
For the database example, let’s create a Student model usually it will create a table in the database with table columns as properties.
php artisan make:model Student -mapp/Models/Student.php:
<?php

namespace App\Models;

use Illuminate\Database\Eloquent\Factories\HasFactory;
use Illuminate\Database\Eloquent\Model;

class Student extends Model
{
    use HasFactory;

    protected $fillable = ['name','email','address'];
}
Place table properties in the database/migrations/create_students_table.php migration file as well:
<?php

use Illuminate\Database\Migrations\Migration;
use Illuminate\Database\Schema\Blueprint;
use Illuminate\Support\Facades\Schema;

return new class extends Migration
{
    /**
     * Run the migrations.
     *
     * @return void
     */
    public function up()
    {
        Schema::create('students', function (Blueprint $table) {
            $table->id();
            $table->string('name');
            $table->string('email');
            $table->string('address');
            $table->timestamps();
        });
    }

    /**
     * Reverse the migrations.
     *
     * @return void
     */
    public function down()
    {
        Schema::dropIfExists('students');
    }
};
Next, you can migrate table properties in the database with the artisan migrate command:
php artisan migrate
Create a Controller
php artisan make:controller StudentControllerDefine Routes
routes\web.php :
<?php

use Illuminate\Support\Facades\Route;
use App\Http\Controllers\StudentController;


Route::view('/add-student','student.create');

Route::controller(StudentController::class)->group(function ()
{

Route::get('/list-student','index')->name('student.list');

Route::post('/store-student','storeStudent')
->name('store.student');

Route::get('/edit-student/{id}','editStudent')
->name('edit.student');

Route::post('/upate-student/{id}','updateStudent')
->name('update.student');

Route::get('/delete-student/{id}','deleteStudent')
->name('delete.student');

});
Create a Laravel Repository Pattern:-
Step 1. Create a folder under the app name Repositories
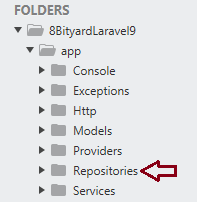
Step 2. Create a folder under the app\Repositories name Interfaces
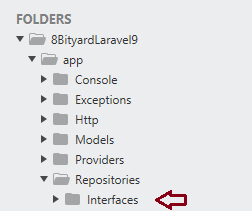
Step 3. Create a file under the app\Repositories\Interfaces name StudentRepositoryInterface.php
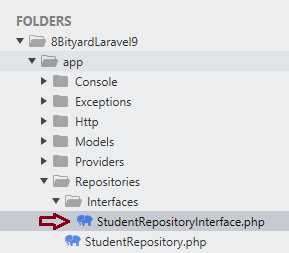
In the app\Repositories\Interfaces\StudentRepository.php file we create an interface and create all the function names in this file and define these functions in other classes.
app\Repositories\Interfaces\StudentRepositoryInterface.php
<?php
namespace App\Repositories\Interfaces;

Interface StudentRepositoryInterface
{
    public function all();

    public function store ($data);

    public function find($id);

    public function update($data, $id);

    public function delete($id);

}
Step 4. Create a class under the app\Repositories name StudentRepository.php
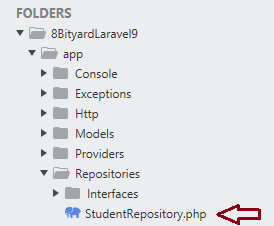
In the app\Repositories\StudentRepository.php file we define all the functions which we are creates in the interface file.
app\Repositories\StudentRepository.php
<?php

namespace App\Repositories;
use App\Models\Student;
use App\Repositories\Interfaces\StudentRepositoryInterface;


class StudentRepository implements StudentRepositoryInterface
{
    public function all(){
        return Student::latest()->paginate(5);
    }

    public function store($data){
        Student::create($data);
    }

    public function find($id){
        return Student::find($id);
    }

    public function update($data,$id){
        Student::where('id',$id)->update($data);
    }

    public function delete($id){
        Student::find($id)->delete();
    }
}
Step 5. Bind the Repository in the Provider
Now, import the Repository and interface file in the provider and bind these files in the register method, they create objects which we access in our controller file.
app\Providers\AppServiceProvider.php :
<?php

namespace App\Providers;

use Illuminate\Support\ServiceProvider;
use App\Repositories\Interfaces\StudentRepositoryInterface;
use App\Repositories\StudentRepository;

class AppServiceProvider extends ServiceProvider
{
    /**
     * Register any application services.
     *
     * @return void
     */
    public function register()
    {
     $this->app->bind(StudentRepositoryInterface::class,StudentRepository::class);
    }

    /**
     * Bootstrap any application services.
     *
     * @return void
     */
    public function boot()
    {
        //
    }
}
Final Step. Import the Interface file name StudentRepositoryInterface in our StudentController
Now create a constructor in a controller and pass the Interface and create a private variable to access the Class.
app\Http\Controllers\StudentController.php :
<?php

namespace App\Http\Controllers;

use Illuminate\Http\Request;
use App\Models\Student;
use App\Repositories\Interfaces\StudentRepositoryInterface;

class StudentController extends Controller
{
    private $StudentRepository;

    public function __construct(StudentRepositoryInterface $StudentRepository)
    {
      $this->StudentRepository = $StudentRepository;
    }

    public function index()
    {
      $students = $this->StudentRepository->all();
      return view('student.list', ['students' => $students]);
    }

    public function storeStudent(Request $request)
    {
      //you can also create a Request class for validation
      $data = $request->validate([
        'name' => 'required',
        'email' => 'required',
        'address' => 'required'
      ]);

      $this->StudentRepository->store($data);

      return redirect()->route('student.list');
    }

    public function editStudent($id)
    {
      $student = $this->StudentRepository->find($id);

      return view('student.edit',['student' => $student]);
    }

    public function updateStudent(Request $request,$id)
    {
      $data = $request->validate([
        'name' => 'required',
        'email' => 'required',
        'address' => 'required'
      ]);

      $this->StudentRepository->update($data,$id);

      return redirect()->route('student.list');
    }

    public function deleteStudent($id)
    {
      $this->StudentRepository->delete($id);

      return redirect()->route('student.list');
    }
}
Create view Files:-
resources\views\student\create.blade.php
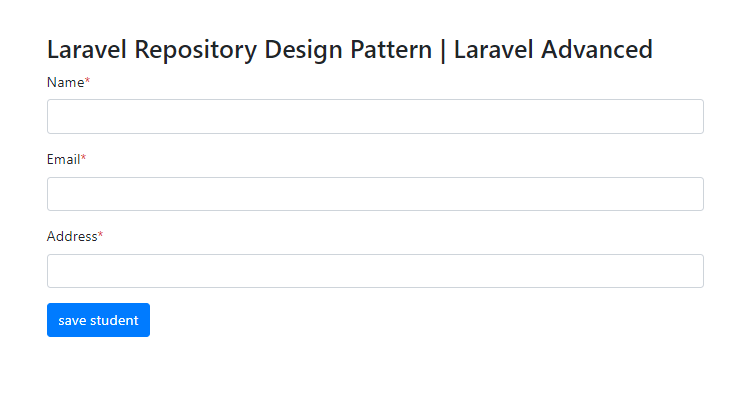
<div class="container">
   <div class="row justify-content-center">
      <div class="col-lg-8">
      <div class="main">
      <h3>Laravel Repository Design Pattern | Laravel Advanced</h3>
      <form action="{{ route('store.student') }}" method="post">
         @csrf
         <div class="form-group">
            <label for="Name">Name<span class="text-danger">*</span></label>
            <input type="text" name="name" class="form-control" required>
         </div>
         <div class="form-group">
            <label for="Email">Email<span class="text-danger">*</span></label>
            <input type="text" name="email" class="form-control" required>
         </div>
         <div class="form-group">
            <label for="address">Address<span class="text-danger">*</span></label>
            <input type="text" name="address" class="form-control" required>
         </div>
         <div class="form-group">
            <button type="submit" class="btn btn btn-primary">save student</button>
         </div>
      </form>
      </div>
      </div>
   </div>
</div>
resources\views\student\list.blade.php

<div class="container">
  <h2>Laravel Repository Pattern - Example</h2>
  <table class="table">
    <thead>
      <tr>
        <th>Sr.no</th>
        <th>Name</th>
        <th>Email</th>
        <th>Address</th>
        <th>Action</th>
      </tr>
    </thead>
    <tbody>
    @foreach ($students as $student)
      <tr>
        <td>{{ $loop->iteration }}</td>
        <td>{{ $student->name }}</td>
        <td>{{ $student->email }}</td>
        <td>{{ $student->address }}</td>
        <td><a href="{{ route('edit.student',$student->id) }}">Edit</a> | <a href="{{ route('delete.student',$student->id) }}">Delete</td>
      </tr>
    @endforeach
    </tbody>
  </table>
</div>
resources\views\student\edit.blade.php
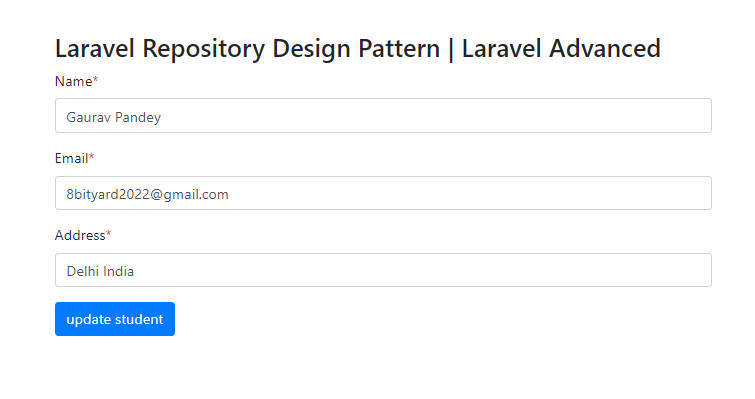
<div class="container">
   <div class="row justify-content-center">
      <div class="col-lg-8">
      <div class="main">
      <h3>Laravel Repository Design Pattern | Laravel Advanced</h3>
      <form action="{{ route('update.student',$student->id) }}" method="post">
         @csrf
         <div class="form-group">
            <label for="Name">Name<span class="text-danger">*</span></label>
            <input type="text" name="name" value="{{ $student->name }}" class="form-control" required>
         </div>
         <div class="form-group">
            <label for="Email">Email<span class="text-danger">*</span></label>
            <input type="text" name="email" value="{{ $student->email }}" class="form-control" required>
         </div>
         <div class="form-group">
            <label for="address">Address<span class="text-danger">*</span></label>
            <input type="text" name="address" value="{{ $student->address }}" class="form-control" required>
         </div>
         <div class="form-group">
            <button type="submit" class="btn btn btn-primary">update student</button>
         </div>
      </form>
      </div>
      </div>
   </div>
</div>
Recommended article:- The Smart Way To Handle Request Validation In Laravel.
Nonetheless, I believe this tutorial will help you in your Laravel application development journey. Share your feedback about this tutorial and help others. Thank you, and have a great day!
Read also:- Change the button color based on the status using the Model in Laravel.