Physical Address
304 North Cardinal St.
Dorchester Center, MA 02124

Today, I will give you an example of “How to disable timestamps in Laravel”, So you can easily apply it with your laravel 5, laravel 6, laravel 7, and laravel 8 application.
First, what we’re doing here, This is the example :
Before :

After :

By default, Eloquent expects created_at and updated_at columns to existing on your model’s corresponding database table. Eloquent will automatically set these column’s values when models are created or updated. If you do not want these columns to be automatically managed by Eloquent, you should define a $timestamps property on your model with a value of false:
There are two way’s to disable timestamps (created_at, updated_at) in Laravel.
At first, we disable created_at and updated_at using Model in Laravel.
We declare public $timestamps = false; in our laravel model to disable timestamp:
<?php

namespace App\Models;

use Illuminate\Database\Eloquent\Factories\HasFactory;
use Illuminate\Database\Eloquent\Model;

class Category extends Model
{
    use HasFactory;

    public $timestamps = false;
    protected $table="categories";


}
Now we disable created_at and updated_at timestamps from Migration, we disable timestamps by removing $table->timestamps() from our migration file; as shown below:
<?php

use Illuminate\Database\Migrations\Migration;
use Illuminate\Database\Schema\Blueprint;
use Illuminate\Support\Facades\Schema;

class CreateCategoriesTable extends Migration
{
    /**
     * Run the migrations.
     *
     * @return void
     */
    public function up()
    {
        Schema::create('categories', function (Blueprint $table) {
            $table->id();
            $table->string('name');
            $table->text('sku');
            $table->longText('description');

            $table->timestamps(); // remove this line for disabling created_at and updated_at date
        });
    }

    /**
     * Reverse the migrations.
     *
     * @return void
     */
    public function down()
    {
        Schema::dropIfExists('categories');
    }
}
Example :
routes\web.php
<?php


use App\Http\Controllers\CategoryController;

/*
|--------------------------------------------------------------------------
| Web Routes
|--------------------------------------------------------------------------
|
| Here is where you can register web routes for your application. These
| routes are loaded by the RouteServiceProvider within a group which
| contains the "web" middleware group. Now create something great!
|
*/

Route::get('/add-category', [CategoryController::class, 'addcategory'])->name('add.cat');
Route::post('/category-store', [CategoryController::class, 'storecategory'])->name('cat.store');
resources\views\category\add.blade.php

   <main>
      <div class="container">
         <div class="row justify-content-center">
            <div class="col-lg-6">
               <div class="main">
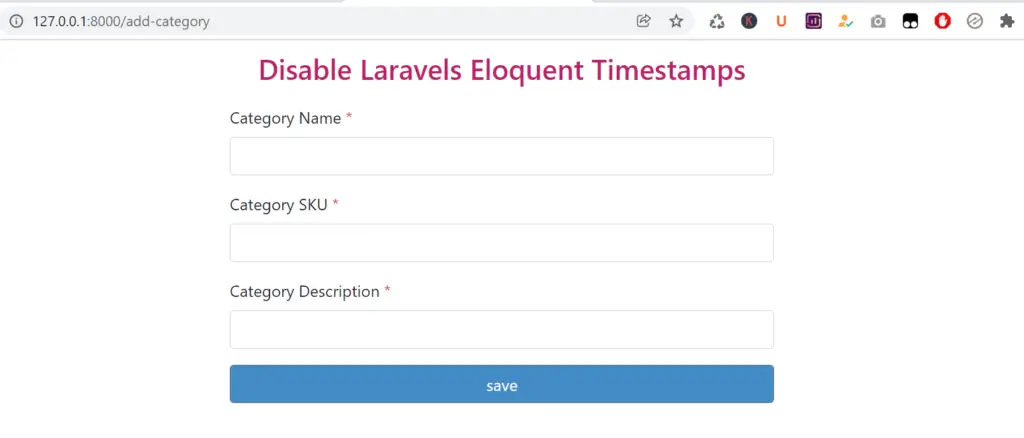
                  <h3><a>Disable Laravels Eloquent Timestamps</a></h3>
                  <form role="form" action="{{route('cat.store')}}" method="post">
                     @csrf
                     <div class="form-group">
                        <label for="name">Category Name <span class="text-danger">*</span></label>
                        <input type="text" name="cat_name" class="form-control">
                     </div>
                     <div class="form-group">
                        <label for="sku">Category SKU <span class="text-danger">*</span></label>
                        <input type="text" name="sku" class="form-control">
                     </div>
                     <div class="form-group">
                        <label for="description  not ">Category Description <span class="text-danger">*</span></label>
                        <input type="text" name="cat_description" class="form-control">
                     </div>
                     <div class="form-group">
                     <button type="submit" class="btn btn btn-secondary">
                      save
                     </button>
                  </form>
               </div>
            </div>
         </div>
      </div>
   </main>
app\Http\Controllers\CategoryController.php
<?php

namespace App\Http\Controllers;

use Illuminate\Http\Request;
use App\Models\Category;

class CategoryController extends Controller
{
    public function addcategory()
    {
        return view('category.add');
    }

    public function storecategory(Request $request)
    {
        $cat = new Category();
        $cat->name = $request->cat_name;
        $cat->sku = $request->sku;
        $cat->description = $request->cat_description;
        $cat->save();
        dd('success);
    }
}
Output:

In this article, we learned “Laravel Disable Timestamps Example”, I hope this article will help you with your Laravel application Project.
Read Also: Update Status Using Toggle Button In Laravel.