Physical Address
304 North Cardinal St.
Dorchester Center, MA 02124

I will provide you with an example of dynamically adding and removing input fields with dynamic input validation using Laravel Livewire.


Livewire is a full-stack framework for Laravel that allows you to build dynamic and interactive web applications.
Many times we need to create a Dynamic input field in the livewire Laravel application, to add multiple entries, for example, to add multiple users at the same time, product details, so we need to create a complete crud application using dynamic input fields in the Livewire application.
Let’s create a complete crud application using dynamic fields in the Livewire application
Generate migration with model
php artisan make:model State -mUpdate Migration
<?php

use Illuminate\Database\Migrations\Migration;
use Illuminate\Database\Schema\Blueprint;
use Illuminate\Support\Facades\Schema;

return new class extends Migration
{
    /**
     * Run the migrations.
     *
     * @return void
     */
    public function up()
    {
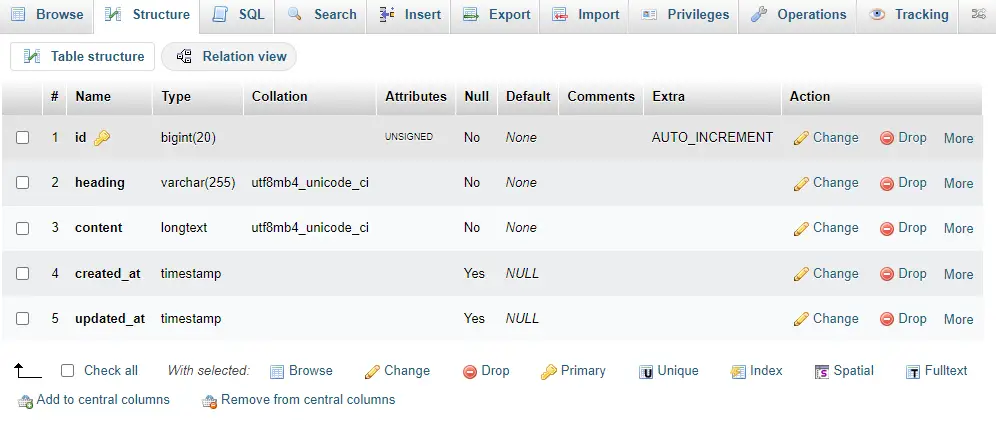
        Schema::create('products', function (Blueprint $table) {
            $table->id();
            $table->string('heading');
            $table->longText('content');
            $table->timestamps();
        });
    }

    /**
     * Reverse the migrations.
     *
     * @return void
     */
    public function down()
    {
        Schema::dropIfExists('exhibitor_profiles');
    }
};
Run Migration
php artisan migrate
Update Model
app\Http\Models\Product.php
<?php

namespace App\Models;

use Illuminate\Database\Eloquent\Factories\HasFactory;
use Illuminate\Database\Eloquent\Model;

class Product extends Model
{
    use HasFactory;

    protected $connection = 'mysql';

    protected $fillable = [];
}
Create Livewire Component
php artisan make:livewire ManageProductDefine web Routes
routes\web.php
<?php

use Illuminate\Support\Facades\Route;
use App\Http\Livewire\ManageProduct;


Route::get('/manage-product',ManageProduct::class)->name('list.product');
Update the product.blade.php file: Open the product.blade.php file located in the resources/views/livewire directory and update it with the Livewire component directive:
resources/views/livewire /product.blade.php
<div>
  <div class="d-flex ">
    <button wire:click="add()" class="btn btn-primary">Add Product</button>
  </div>
  <div class="card-body">
    <div class="table-responsive p-0">
      <table class="table mb-0">
        <thead>
          <tr>
            <th class="text-uppercase">#</th>
            <th class="text-uppercase">Title</th>
            <th class="text-uppercase">Content</th>
            <th class="text-secondary"></th>
          </tr>
        </thead>
        <tbody> @foreach ($products as $index => $product) <tr>
            <td>{{ $loop->iteration }}</td>
            <td>
              <input type="text" wire:model="products.{{ $index }}.heading">
              @error('products.'.$index.'.heading') <p class="error"> {{ $message }}</p> @enderror
            </td>
            <td>
              <textarea wire:model="products.{{ $index }}.content" rows="2"></textarea>
              @error('products.'.$index.'.content') <p class="error"> {{ $message }}</p> @enderror
            </td>
            <td>
              <div class="ms-auto">
                <button wire:click="delete({{ $index }})">Delete</button>
              </div>
            </td>
          </tr>
          <tr>
        </tbody> @endforeach
      </table>
    </div>
  </div>
  <div class="d-flex">
    <button wire:click="save()" type="submit">Update Product</button>
  </div>
</div>
Now, update the ManageProduct.php file: Open the ManageProduct.php file located in the app\Http\Livewire directory and update it with the Livewire file:
app\Http\Livewire\ManageProduct.php
<?php

namespace App\Http\Livewire;

use Livewire\Component;
use App\Models\Product;

class ManageProduct extends Component
{
    public $products;

    protected $rules = [
        'products.*.heading' => 'required',
        'products.*.content' => 'required',
    ];

    public function messages()
    {
        return [

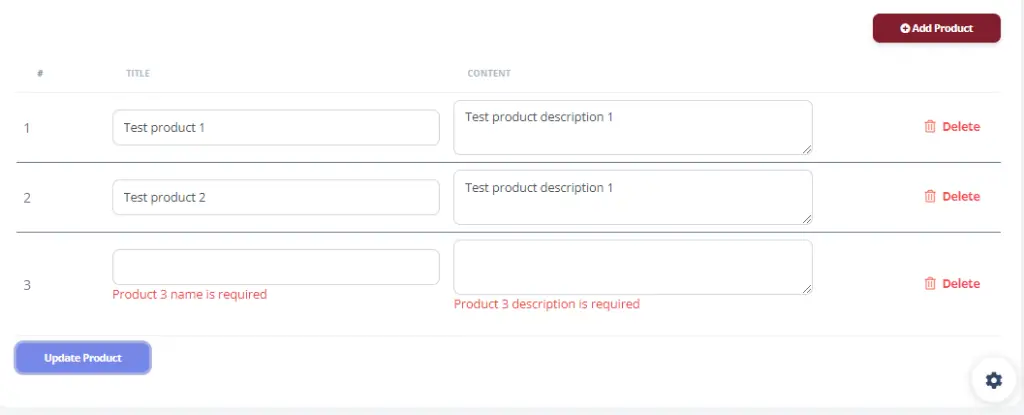
        'products.*.heading.required' => __(key:'Product :position name is required'),
        'products.*.content.required' => __(key:'Product :position description is required'),
        ];
    }

    public function mount()
    {
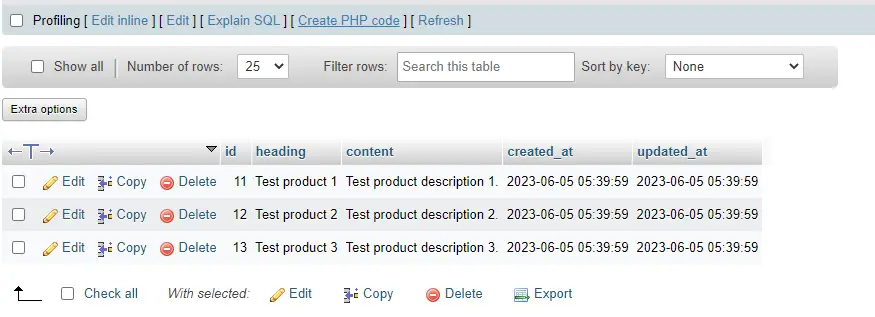
        $this->products = Product::all();
    }

    public function add()
    {
        $this->products->push(new Product());
    }

    public function save()
    {
        $this->validate();
        foreach($this->products as $product)
        {
            $product->save();
        }
        $this->dispatchBrowserEvent('success-alert');
    }

    public function delete($index)
    {
        $product = $this->products[$index];
        $this->products->forget($index);
        $product->delete();
    }

    public function render()
    {
        return view('livewire.product');
    }

}
To add validation to dynamically generated input fields in a Livewire component, you can utilize Livewire’s built-in validation features. Here’s an example of how you can implement dynamic input validation in a Livewire component:

In the example above, we have added validation rules dynamically in the addField() method based on the field’s index. We use the $rules property to store the validation rules for each field.
The save() method is responsible for performing the save logic. Before saving, we call $this->validate() to trigger the validation process. If any of the dynamic input fields fail validation, the validation error messages will be displayed using the @error directive in the view.
Related article:- Laravel Array Validation: Set Messages with Position/Index.
The reset() method is used in the save() method to clear the fields and rules properties after the save operation is completed.
Now, when you add or remove dynamic input fields and click the “Save” button, Livewire will perform the validation according to the defined rules. Any validation errors will be displayed next to the respective input fields.
protected $rules = [
        'products.*.heading' => 'required',
        'products.*.content' => 'required',
    ];

    public function messages()
    {
        return [

        'products.*.heading.required' => __(key:'Product :position name is required'),
        'products.*.content.required' => __(key:'Product :position description is required'),
        ];
    }
Test the functionality:
Run your Laravel development server:
php artisan serveNow, when you visit http://localhost:8000/manage-product in your browser, you can see the “Dynamic Input Fields Example” with an “Add Input Field with delete” button in the Livewire application.
I hope that this article helped you learn How to create dynamic input fields with validation in the Livewire example. You may also want to check out our guide on How to get the selected option value in the Livewire application.