Physical Address
304 North Cardinal St.
Dorchester Center, MA 02124

In this tutorial, I will give you an example of “Laravel Blade components”, So you can easily apply it with your laravel 7, laravel 8, and laravel 9 application.
First, what we’re doing here, This is the example :


Laravel components are an advanced feature, which is added from laravel 7th version. In this tutorial, we discuss what is component, how to make and use components in the blade template and pass data in the component.
A component is a piece of code, which we can reuse in any blade template. It’s something similar to sections, layouts, and includes. For example, we use the same bootstrap alert example for each template, so we can create a Bootstrap Alert component, which we can reuse.
The use of components for better understanding is that you need to use a Sign-Up button on the website at many places, like in the header, footer, or any other place on the website. Then make a component of that button code and reuse it.
Related article:- How to Display Session Flash Message in Laravel 8.
php artisan make:component AlertThis command makes two files in your laravel project.
One PHP file is created with the name of Alert.php inside app/http/View/Components directory.
And another HTML file is created with the name of alert.blade.php inside resources/views/components/ directory.
Let’s create a Bootstrap alert and call it on the blade file, where ever you want to show an alert message.
app\View\Components\Alert.php
<?php

namespace App\View\Components;

use Illuminate\View\Component;

class Alert extends Component
{
    /**
     * Create a new component instance.
     *
     * @return void
     */
    public $type;
    public $message;

    public function __construct($type=NULL,$message=NULL)
    {
        $this->type = $type;
        $this->message = $message;

    /**
     * Get the view / contents that represent the component.
     *
     * @return \Illuminate\Contracts\View\View|\Closure|string
     */
    }
    public function render()
    {
        return view('components.alert');
    }
}
resources\views\components\alert.blade.php
<div class="row justify-content-end mb-1">
<div class="col-sm-12 float-right">
@if(Session::has('message'))
<div class="alert alert-{!! session('type')!!} alert-dismissible p-2">
<a href="#" class="close" data-dismiss="alert" aria-label="close">×</a>
<strong>{!! session('message')!!}.
</div>
@endif
</div>
</div>
Create a Controller :
php artisan make:controller ComponentExampleControllerroutes\web.php :
#Component Alert Example

Route::get('/student-add', [ComponentExampleController::class, 'create'])->name('student.create');
Route::get('/student-list', [ComponentExampleController::class, 'index'])->name('student.index');
Route::post('/student-store', [ComponentExampleController::class, 'store'])->name('student.store');
app\Http\Controllers\ComponentExampleController.php :
<?php

namespace App\Http\Controllers;

use Illuminate\Http\Request;
use App\Models\Student;

class ComponentExampleController extends Controller
{
    public function create()
    {
        return view('exapmple-component-use.add-student');
    }

    public function index()
    {
        $students = Student::get();
        return view('exapmple-component-use.list-student',compact('students'));
    }

    public function store(Request $request)
    {
        $student = new Student();
        $student->name = $request->name;
        $student->email = $request->email;
        $student->phone = $request->phone;
        $student->save();
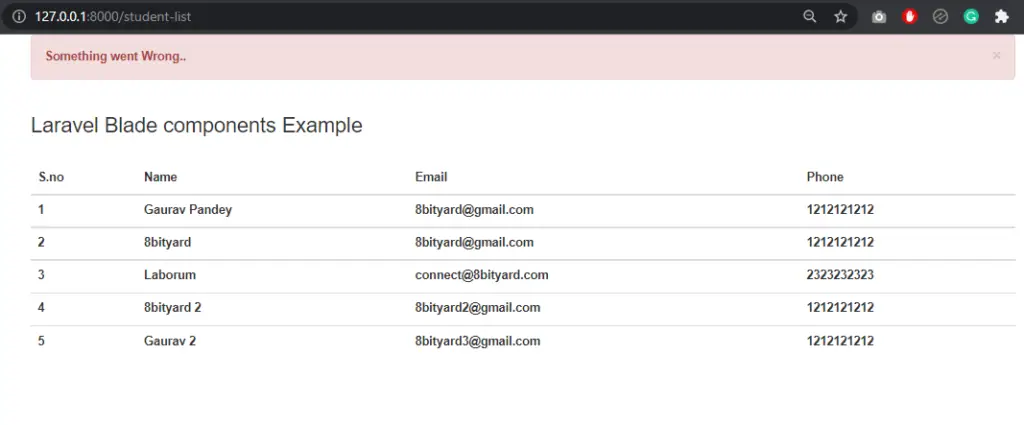
        return redirect()->route('student.index')->with(['type'=>'danger','message'=>'Something went Wrong.']);
    }
}
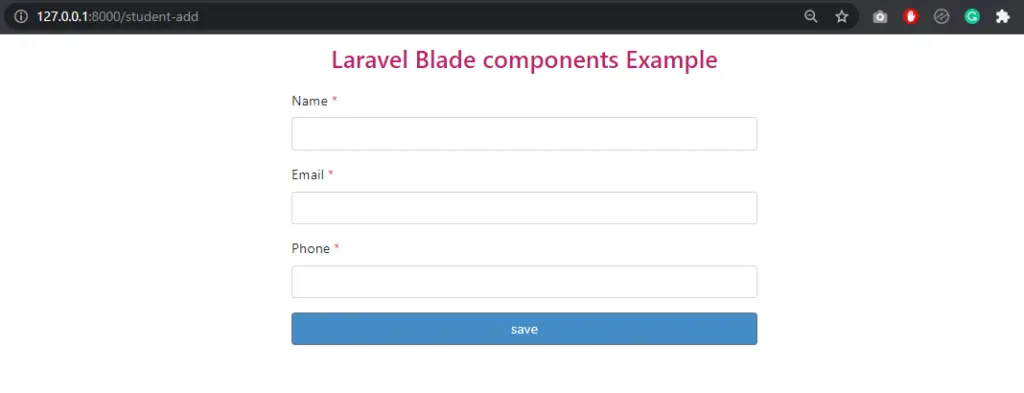
resources\views\example-component-use\add-student.blade.php
   <main>
      <div class="container">
         <div class="row justify-content-center">
            <div class="col-lg-6">
               <div class="main">
                  <h3><a>Laravel Blade components Example</a></h3>
                  <form role="form" action="{{route('student.store')}}" method="post">
                     @csrf
                     <div class="form-group">
                        <label for="name">Name <span class="text-danger">*</span></label>
                        <input type="text" name="name" class="form-control" required>
                     </div>
                     <div class="form-group">
                        <label for="email">Email <span class="text-danger">*</span></label>
                        <input type="email" name="email" class="form-control" required>
                     </div>
                     <div class="form-group">
                        <label for="phone">Phone <span class="text-danger">*</span></label>
                        <input type="phone" name="phone" class="form-control" required>
                     </div>
                     <div class="form-group">
                     <button type="submit" class="btn btn btn-secondary">save</button>
                  </form>
               </div>
            </div>
         </div>
      </div>
   </main>
resources\views\example-component-use\list-student.blade.php
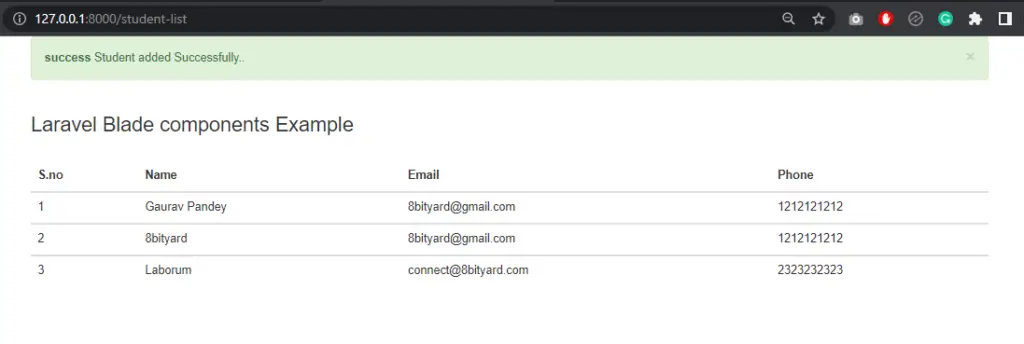
Call alert Mesage in Laravel :-
       <div class="container">

        <x-alert/>

         <h3>Laravel Blade components Example</h3>
         <table class="table">
            <thead>
               <tr>
                  <th>S.no</th>
                  <th>Name</th>
                  <th>Email</th>
                  <th>Phone</th>
               </tr>
            </thead>
            <tbody>
               @foreach($students as $key => $student)
               <tr>
                  <td>{{ $key+1 }}</td>
                  <td>{{ $student->name }}</td>
                  <td>{{ $student->email }}</td>
                  <td>{{ $student->phone }}</td>
               </tr>
            </tbody>
            @endforeach
         </table>
      </div>
<strong>Syntax:-</strong> <x-alert/>Output:-


In this article, we learned “How to use Laravel Blade components in Laravel”, I hope this article will help you with your Laravel application Project.
Read also:- How to use toastr js in laravel 8 example.
