Physical Address
304 North Cardinal St.
Dorchester Center, MA 02124

Today, I will give you an example of “How to use toastr js in laravel”, So you can easily apply it with your laravel 5, laravel 6, laravel 7, laravel 8, and Laravel 9 application.
First, what we’re doing here, This is the example :


The requirement of alert or notification in every project for showing a popup, alert on form submit, and on update or delete records or perform a particular task.
We use different types of notifications or alerts like bootstrap session flash alert, sweet alert, or different package libraries.
Related article:- Sweet alert delete confirm in Laravel.
We already discussed laravel session flash alert and sweet alert in our previous articles, today we have a look at Toastr js alert in the Laravel application.
Toastr is a Javascript library for non-blocking notifications. jQuery is required. The goal is to create a simple core library that can be customized and extended.
For more: Complete Documentation.
Dependencies :
jQuery toast, you need to add CSS and js to your HTML.
CSS :-

<link rel="stylesheet" href="http://cdn.bootcss.com/toastr.js/latest/css/toastr.min.css">
JS :-

<script src="http://cdn.bootcss.com/jquery/2.2.4/jquery.min.js"></script>
<script src="http://cdn.bootcss.com/toastr.js/latest/js/toastr.min.js"></script>
{!! Toastr::message() !!}
Let’s get started.
Installation :
composer require brian2694/laravel-toastrGenerating Migration with Model :
php artisan make:model Post -mMigration Structures :
<?php

use Illuminate\Database\Migrations\Migration;
use Illuminate\Database\Schema\Blueprint;
use Illuminate\Support\Facades\Schema;

class CreatePostsTable extends Migration
{
    /**
     * Run the migrations.
     *
     * @return void
     */
    public function up()
    {
        Schema::create('posts', function (Blueprint $table) {
            $table->increments('id');
            $table->string('title');
            $table->longText('description');
            $table->string('author');
            $table->timestamps();
        });
    }

    /**
     * Reverse the migrations.
     *
     * @return void
     */
    public function down()
    {
        Schema::dropIfExists('posts');
    }
}
Run Migration :
php artisan migrateapp\Models\Post.php :
<?php

namespace App\Models;
use Illuminate\Database\Eloquent\Factories\HasFactory;
use Illuminate\Database\Eloquent\Model;

class Post extends Model
{
    use HasFactory;

}
Create a Controller :
php artisan make:controller PostControllerroutes\web.php :
<?php

use Illuminate\Support\Facades\Route;

use App\Http\Controllers\PostController;

/*
|--------------------------------------------------------------------------
| Web Routes
|--------------------------------------------------------------------------
|
| Here is where you can register web routes for your application. These
| routes are loaded by the RouteServiceProvider within a group which
| contains the "web" middleware group. Now create something great!
|
*/


#Manage Post
Route::get('/post-create',[PostController::class, 'create'])->name('post.create');
Route::post('/post-store',[PostController::class, 'store'])->name('post.store');
Route::get('/post-list',[PostController::class, 'list'])->name('post.list');
app\Http\Controllers\PostController.php :
<?php

namespace App\Http\Controllers;

use Illuminate\Http\Request;
use App\Models\Post;


use Brian2694\Toastr\Facades\Toastr;

class PostController extends Controller
{
    public function create()
    {
        return view('post.create');
    }

    public function store(Request $request){
        $post = new Post();
        $post->author = $request->author;
        $post->title  = $request->title;
        $post->description = $request->description;
        $post->save();
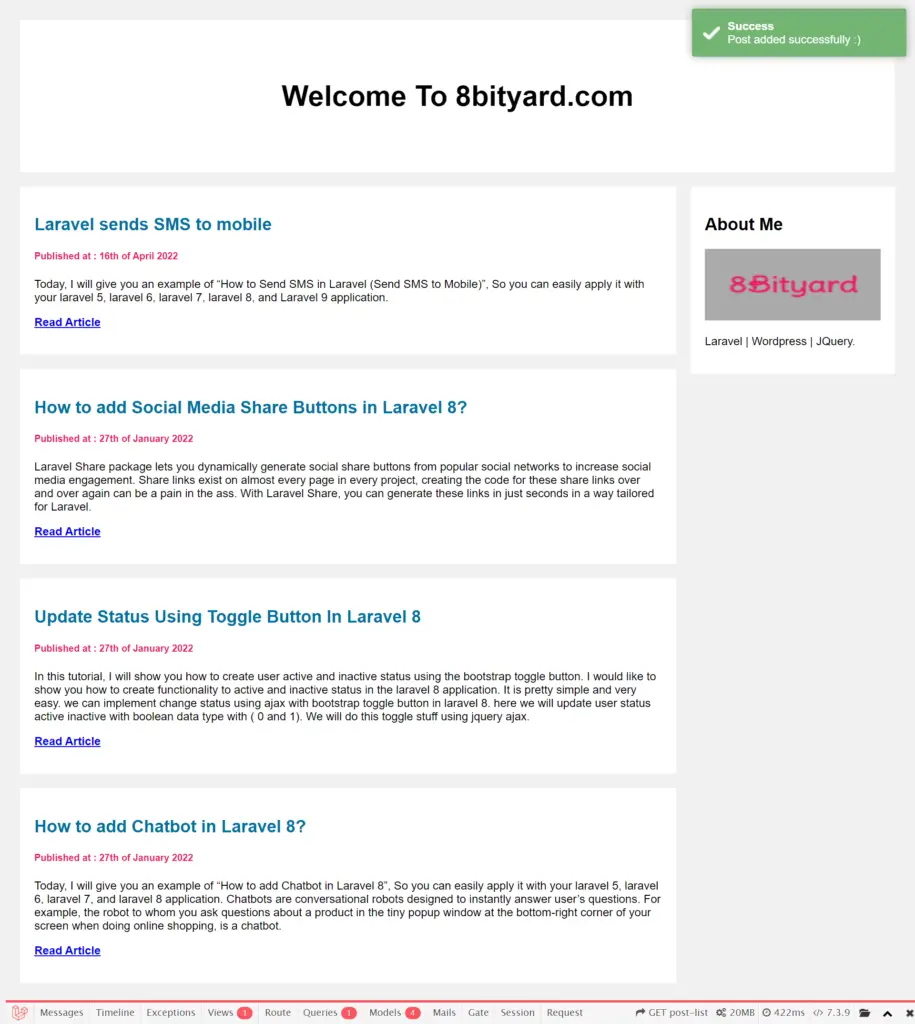
        Toastr::success('Post added successfully :)','Success');
        return redirect()->route('post.list');

    }

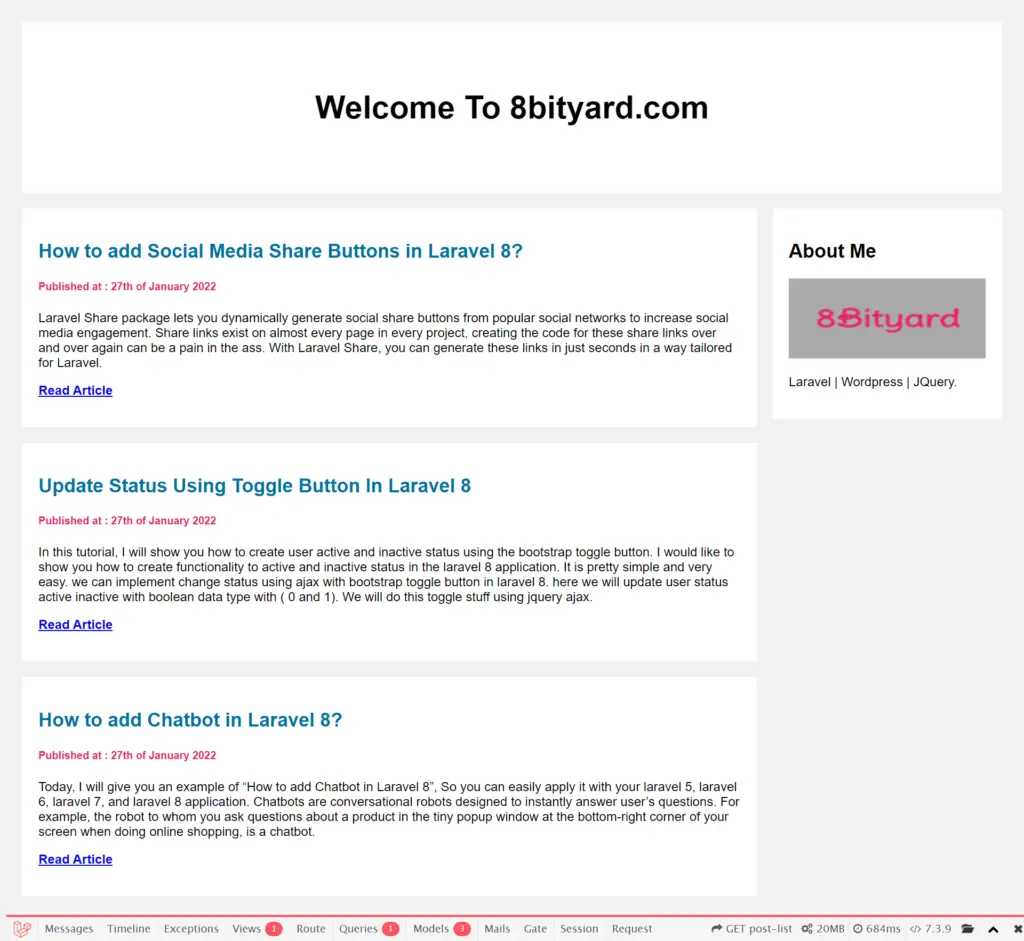
    public function list()
    {
        $posts = Post::orderBy('id','desc')->get();
        return view('post.list',compact('posts'));
    }
}
resources\views\post\create.blade.php :

<!DOCTYPE html>
<html>

<head>
	<link rel="stylesheet" href="https://maxcdn.bootstrapcdn.com/bootstrap/4.5.2/css/bootstrap.min.css">
	<script src="https://ajax.googleapis.com/ajax/libs/jquery/3.5.1/jquery.min.js"></script>
	<script src="https://maxcdn.bootstrapcdn.com/bootstrap/4.5.2/js/bootstrap.min.js"></script>
</head>
<main>
	<div class="container">
		<div class="row justify-content-center">
		<div class="col-lg-6">
		<div class="main">
		<h3><a>How to Use Toastr JS in Laravel 8 For Showing Notification.</a></h3>
		<form role="form" action="{{route('post.store')}}" method="post"> @csrf
			<div class="form-group">
				<label for="title">Post Title<span class="text-danger">*</span></label>
				<input type="text" name="title" class="form-control" required> </div>
			<div class="form-group">
				<label for="author">Post Author<span class="text-danger">*</span></label>
				<input type="text" name="author" class="form-control" required> </div>
			<div class="form-group">
				<label for="description">Post Description<span class="text-danger">*</span></label>
				<input type="text" name="description" class="form-control" required> </div>
			<div class="form-group">
				<button type="submit" class="btn btn btn-secondary">save</button>
			</div>
		</form>
	</div>
	</div>
</div>
</div>
</main>
</body>
</html>
resources\views\post\list.blade.php :

<!DOCTYPE html>
<html>

<head>
	<meta name="viewport" content="width=device-width, initial-scale=1">
	<link rel="stylesheet" href="http://cdn.bootcss.com/toastr.js/latest/css/toastr.min.css"> </head>

<body>
	<div class="header">
		<h4>Welcome To 8bityard.com</h4> </div>
	<div class="row">
		<div class="leftcolumn"> @foreach($posts as $post)
			<div class="card">
				<h2 style="color:#0071a1;">{{ $post->title }}</h2>
				<h5 style="color:#e91e63;">Published at : {{$post->created_at->format('jS \\of F Y') }}</h5>
				<p>{{ $post->description }}</p>
				<p><b><a href="{{route('post.view',$post->id)}}">Read Article</a></b></p>
			</div> @endforeach </div>
		<div class="rightcolumn">
			<div class="card">
				<h2>About Me</h2> <img class="fakeimg" style="height:100px;" src="https://8bityard.com/ezoimgfmt/mllibnjakigh.i.optimole.com/e4PqOHU-NUmggukx/w:110/h:48/q:auto/https://8bityard.com/wp-content/uploads/2020/05/cropped-cropped-LogoMakr_48yknb-2.png?ezimgfmt=rs:110x48/rscb1/ng:webp/ngcb1">
				<p>Laravel | WordPress | JQuery.</p>
			</div>
		</div>
	</div>
	<script src="http://cdn.bootcss.com/jquery/2.2.4/jquery.min.js"></script>
	<script src="http://cdn.bootcss.com/toastr.js/latest/js/toastr.min.js"></script> {!! Toastr::message() !!} </body>

</html>
toastr js example
How do you add a Toastr in laravel
What is toastr in Laravel
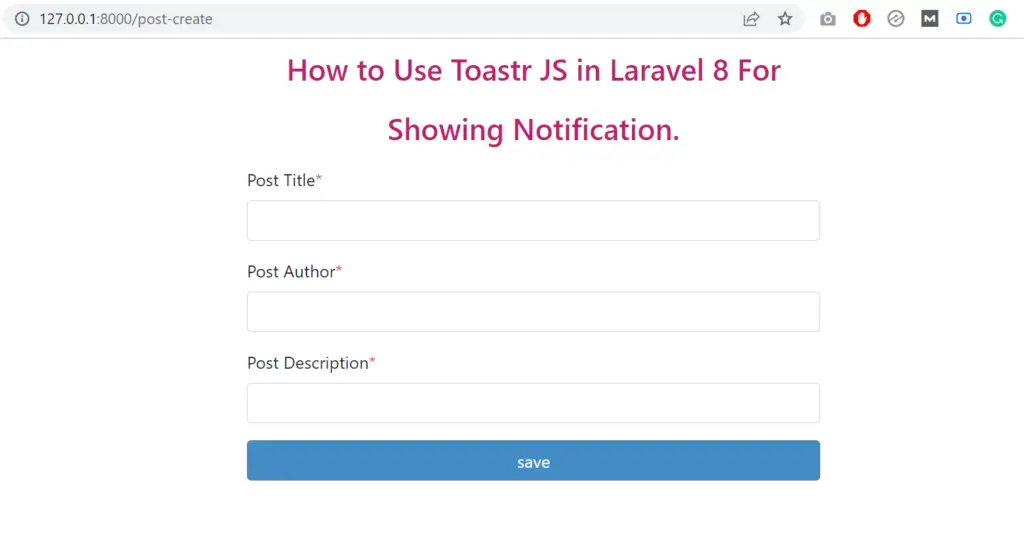
Run Application :
127.0.0.1:8000/post-create
Read also : Sweet alert delete confirm in Laravel 8.
In this article, we learned “How to use toastr js alert notification in laravel”, I hope this article will help you with your Laravel application Project.